Refashion #2 The Luna Jacket Papercut Patterns

So this is my second refashion in my refashion posts. The Luna Jacket by Papercut Patterns. I can’t remember when I actually bought this pattern but it was during one of the Papercut sales, where I acquired a few more that I have been coveting for a while. My intention for it was to use it for refashioning purposes and specifically for a quilted version. At this point I will interrupt this post, because I can’t have quilted and Luna jacket in the same sentence and not mention the most gorgeous interpretation of it by @fivespicepower

While I was contemplating the quilted version and making other things, I came across my partner’s cotton robe that for years we have been dragging from one house to the other and from one peg to the other. I don’t really know why we never got rid of it. It was big enough I thought to accommodate a muslin for the Luna Jacket. As per my bad habit I didn’t take a picture of the robe before chopping it, but it was this style dressing gown in a grey colour.

Here is what it looked liked after I had the pattern pieces cut and sewn together. The pockets are the original ones which I had left at the same size at this stage. As you can see the fabric isn’t in the best condition but I still hoped it would look great as a finished garment. Well, I was wrong. Every time I looked at it, I could see the original dressing gown. That perception was also not helped by the fact that during one of my usual Skype sessions with my parents my mum spotted it on the mannequin and asked me if I was making a robe.

In an attempt to shake off the robe impression, I decided to dye it. I can’t remember if used emerald green, or forest green dylon dye but the result was not what I had imagined. I also thought the fabric looked even worse.

Out came the fabric paint and the brushes.I really liked the light purple gold combination of these random shapes but didn’t have a lot of this colour, so I continued with a lighter shade and some gold. At this point, I decided I wasn’t going to wear it because it looked a bit of a mess and started playing on it with some fabric markers. Luckily, I only experimented on the pockets, which I later removed completely. I was again not achieving what I had in my mind.

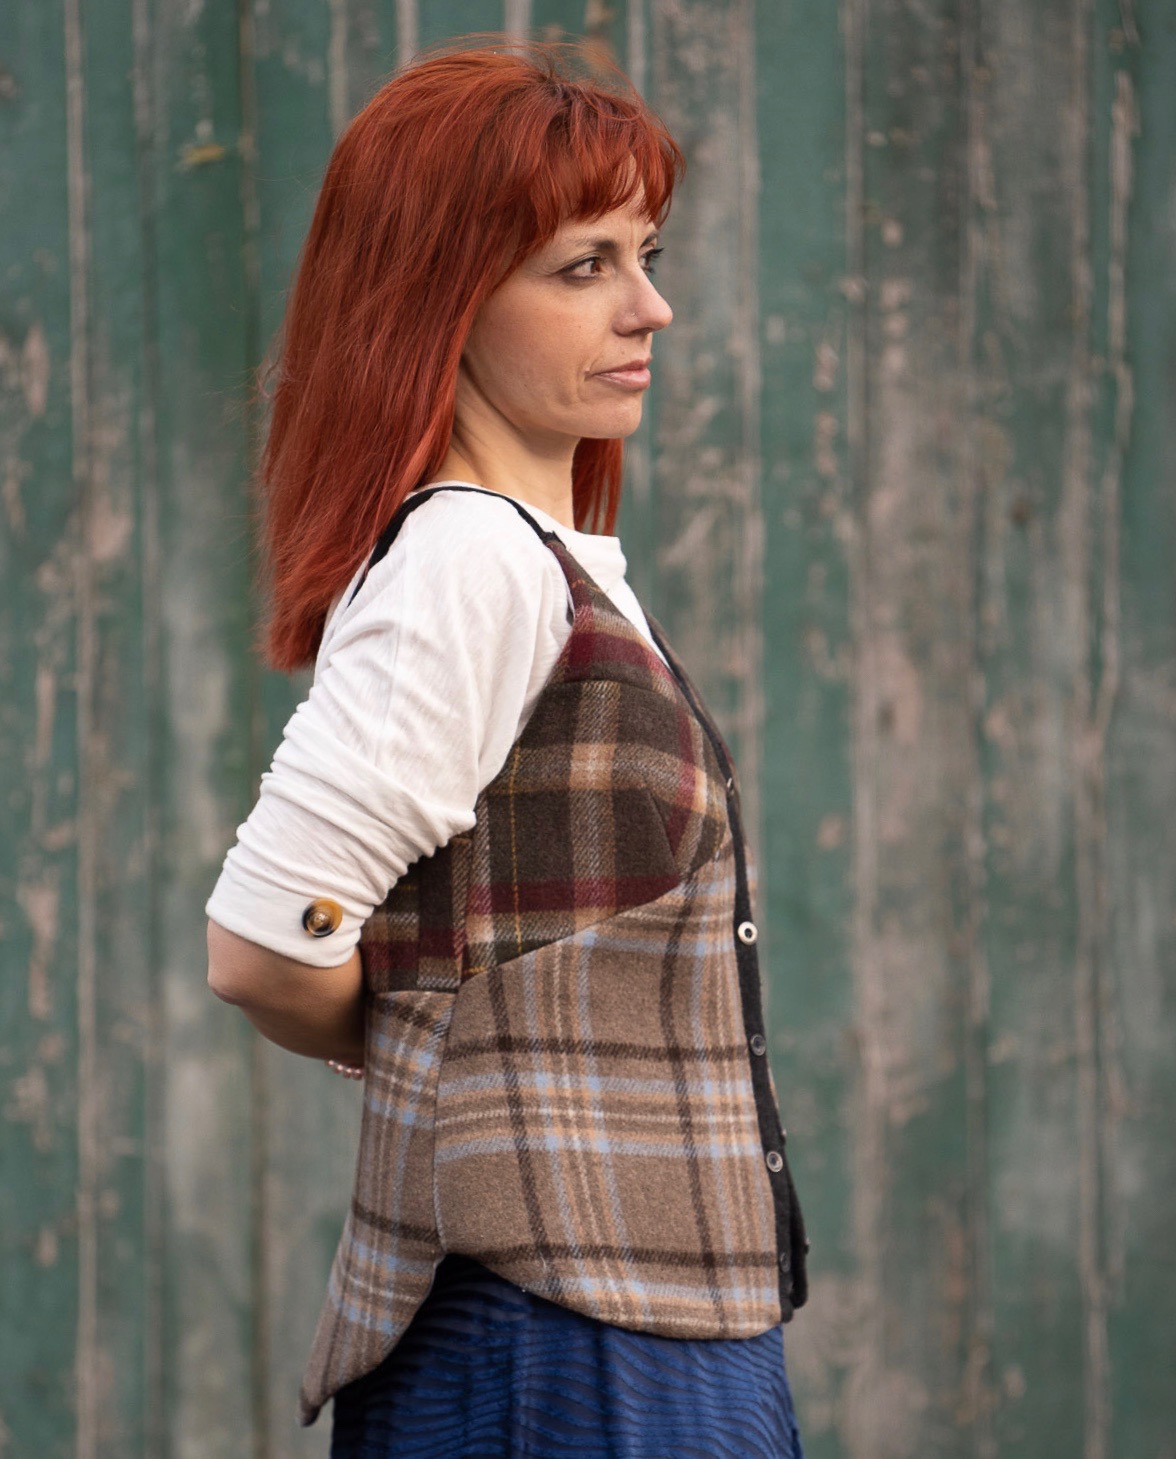
It looks like I wasn’t ready to give up but also saw this more as an experimentation and a time to play with various embellishing techniques. I ordered some neon green thread and machine stitched to death the whole thing. There was absolutely no plan as to the direction of it or the consistency, I just went for it starting first on one side with the diagonal lines but then decided to try some vertical lines on the other side. I think I prefer the vertical ones better.

I even created a pocket outline which is now kind of confusing as I keep trying to put my hands in there. I didn’t put the pockets back on because I decided I didn’t really like them, although they would have definitely been handy. I also added some bias binding at the front and back which I think changed the whole garment completely.

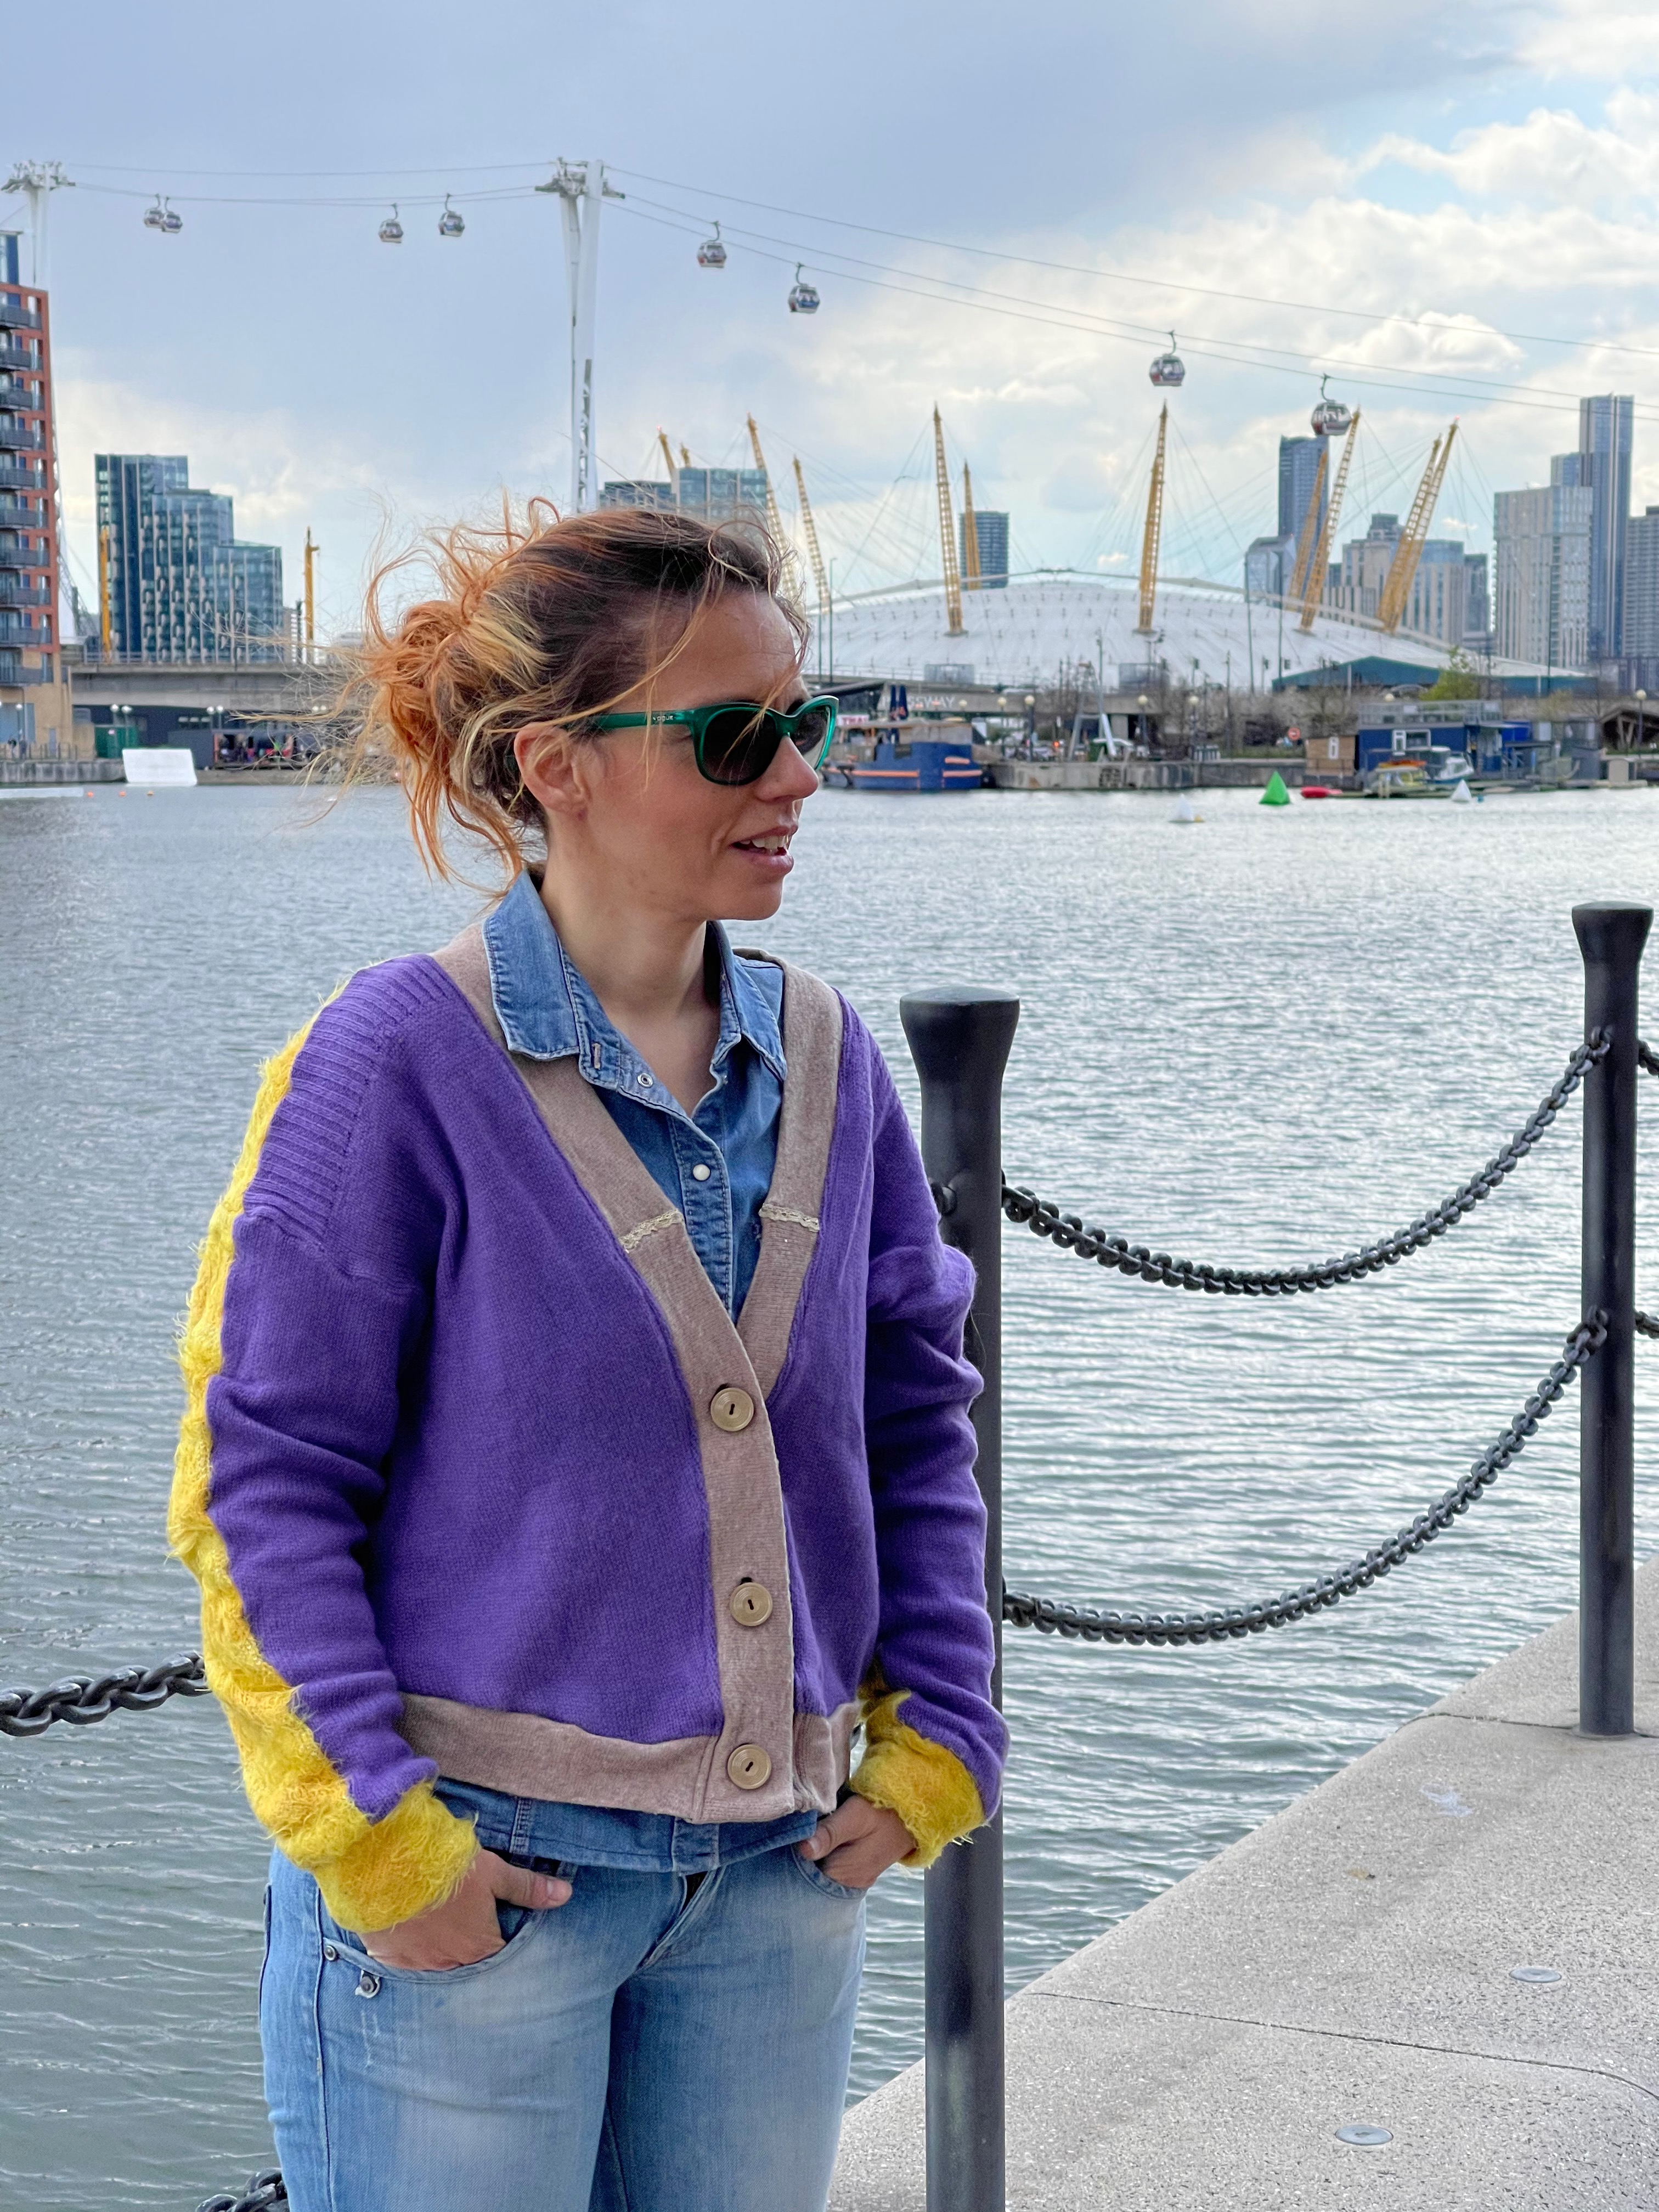
Now for the pattern, it is very straightforward, I think the instructions are clear and the end result is great. I love the wide sleeves and the general relaxed feel of the garment. I cut a size 2, I could possible go smaller too for a shorter closer fitted result but I love it as it is.

There are two belts on the inside and two on the outside front and two on the sides, you can wear it crossed or simply tied at the front or loose.

There is plenty of ease and room for potential layering and it’s an excellent outwear contender for spring and beyond.

I am aware that my embellishments and the refashion isn’t everyone’s cup of tea but I absolutely love how this turned out, there is something of a workwear and painter’s jacket to it, which sits very fine with me. I admit I hold on to some RTW garments I no longer wear, because I see potential for something else in there. This robe wasn’t in a condition to be donated and used by someone else, so it would have ended up in the bin. I’m glad I saved it and turned it into something else. I also see refashioning as another form of creativity and sometimes the creation of a completely new textile and material.

I think it will look great with jeans and shorts later on for the the days in the park and I know it will be great for the late evening at the beach, if I get to one this year. It’s clear from these pictures that I’m dreaming of different climates, haha. It took me a couple of months to finish this but the pattern itself comes together really quickly. I have plans for a properly quilted version and a coat hack.

Posted in New Beginnings | Tagged , , , , , , , | 4 Comments

Simplicity 8526

Simplicity 8526 is my most sewn pattern. It consists trousers, top, top with hoodie and a hat. It’s one of my favourite patterns because it is so versatile and you can use it both for outwear as well as pyjamas. I bought it initially to make a halloween costume for my son, a couple of years ago. He wanted to get dressed as Gekko from PJ Masks, so while looking for leggings and hoodies, I came across it. When it comes to costumes for children I’m all for two pieces garments rather than onesies as they are more convenient for toilet at this age. I was drawn to it because of the hoodie with the spikes, that resembled so much that of Gekko’s.

I messed up the hood element on my first attempt but they boy was immensely happy with his costume, so I didn’t beat myself too much for it.

Since then I’ve sewn the top version quite a few times. As a t-shirt twice with some wonderful fabric from Material Girl Laura.

The construction is really easy and the raglan sleeves take out the stress of setting in sleeves, which for me is one of my least favourite tasks. It is one of these patterns that you only need to make once and then you don’t need to look at the instructions again. My son has just turned 5 and the last three I have made him are size 6 and they fit fine. The only thing I don’t like about this and unfortunately didn’t remember last time I sewed it, is that the neckline is quite wide and at least in my case I should use the smaller size there and grade it to the larger one for the rest of the top.

I recently sewed some more tops of this wonderful pattern, this time with gorgeous See you at Six fabric purchased from Lamazi Fabrics Aren’t these Tubas just awesome? I love these designs so much.

The second see you at six fabric was leftover from a top that I made with the same fabric. It required a little bit of creative cutting. There wasn’t enough to cut the back piece as one so it’s made out of two and the same goes for one of the sleeves too.

This last top was one of my latest refashions of one of his dad’s t-shirts. Half of it was full of holes but since it was XXL it left us with enough fabric for a mini version of it. I was really happy we could retain the full packman design at the front. I used some fabric paint to retouch the the ghosts and packman itself as they had faded out. This photo is a good example of what I meant earlier about the wide neckline.

Overall it is a great pattern to have if you are making clothes for your children, it goes up to size 8 so I’m sure I have a few more tops to try there. Maybe even some trousers too. Very beginner friendly.

Posted in New Beginnings | Tagged , | Leave a comment

Refashion post #1 Marlo Sweater True Bias

This year and without any particular plan or intention in mind, I started refashioning some of the old clothes I’ve been hoarding. Mostly RTW that I somehow didn’t want to part with but also some handmade items, which didn’t work and have been hardly worn. I can be quite ruthless with my handmade items, if I see that I don’t wear them and the fabric is in a re-usable condition. My plan is over the following months to post about these recycled garments in a Refashion Posts series.

First up is the Marlo Sweater by True Bias I bought the pattern soon after it was released and having seen a few beautiful iterations of it, I was convinced it would be the perfect pattern to reuse this dark blue ponte roma, which was once a handmade tunic dress. Unfortunately, I don’t have a photo of the actual dress. I made it about 6 years ago. It ended up a couple of sizes too big and I recall having worn it once, while I was pregnant and even then I hated it. As it consisted of fairly large pieces of fabric, I kept it with the intent to use the fabric to make a hoodie or a similar garment. The colour is quite dark so it hides very well, the seams of the darts and where two pieces of fabric were connected.

I cut a size 6 and made no alterations but in retrospect, I think I’d prefer a size smaller at least for the top part of the bodice. The fabric from the handmade dress couldn’t accommodate the whole pattern, so another piece of garment came to the rescue. The light blue and significantly lighter weight jersey came from an RTW dress that had already been chopped but there was still enough fabric for a pair of half sleeves and the cuffs.

On the back you can see the jigsaw assembly and the nice I believe contrast the darker colour creates with the lighter shades. Unfortunately, neither of my existing fabrics were long enough to accommodate the waistband and neckband, so I purchased 1 metre of inexpensive ponte roma to finish it. The buttons on the front were from a stash of buttons, someone who didn’t want them passed on to me. These photos were taken in February on a sunny day, where the temperature had gone up a bit and I was hopeful spring was coming and soon I’d be wearing this without a jacket on top.

Still thinking that the weather was getting warmer, I decided to cut another colour blocked Marlo out of two woollen jumpers and some mystery fabric, I brought from China about 7 years ago and was sitting washed and ready to turn into something at the bottom of one of my stash boxes (I don’t have a big stash). The great British weather of course didn’t disappoint and gave me lots of opportunities to wear it again and again.

The purple front comes from a jumper that was given to my dad as a present many years ago. He wouldn’t be caught dead wearing this colour. My mum packed it in my suitcase on my way back to the UK to offer it to my partner, who had the same reaction to the colour and style of the top as my dad. It is really soft and of great quality. It’s been refashioned once to a top for myself. I did such a bad job of it that I never wore it but kept it for further refashioning or fixing (although it was beyond that point) This is the same size 6 Marlo but as the fabrics are much more fluid it ended up quite oversized, which isn’t necessarily bad but I would have definitely preferred it to be slightly smaller. I didn’t want to lose any of the length of the purple fabric, so I used the waistband on the shoulders as a design feature. The light brown neck and waist band is from another jumper that I bought for maternity wear and hated as it was way too big and not great style. I ended up wearing it in the house and after I lost the pregnancy weight I shoved it in the back of the wardrobe until now.

For the sleeves I used the same approach as for the blue Marlo. Sometimes I look at the purple-yellow combo and all I can see is Los Angeles Lakers basketball team, haha!

The back of the top is constructed with the mystery yellow fabric, which is really fluffy and cosy. The buttons on the front are from the same stash as the ones on the blue Marlo.

The pattern itself is great, the instructions are super clear and detailed, there are two versions for finishing the neckline, I used the quick & dirty one for both of these but I’m planning to try the advanced one for the subsequent ones, in smaller size and a bit fancier fabrics. Both will have a refashion element. It is also great for beginners and once you’ve done the first one, you can do more with your eyes closed. For the record the purple/yellow sweater photos were taken today in April. I was wearing a jacket on top.

Posted in New Beginnings | Tagged , , , | Leave a comment

Envelope Dress Criswoodsews

Around April time, I made a top version of the Criswoodsews envelope dress in absence of the appropriate length of fabric to make the dress. It was a very easy project and I have worn it loads since then. It is also one of my most liked posts on Instagram. I haven’t been following Cris for a very long time, but I am a big fan of her style and aesthetic, also her ability to combine anything into a great outfit.Whitagram-ImageI bought the pattern our of curiosity mostly and because I really liked the effortless silhouette of the dress, which is at the same time quite different to the silhouettes I am usually drawn to.  I’ve been putting off the dress version of it for a while, because the weather had been quite volatile and also as time goes by, I feel that any form of summer holidays in a hot country (ie Greece) is disappearing for this year, along with the summer. One hot, sunny day was enough to change my mind, though.

IMG_0379
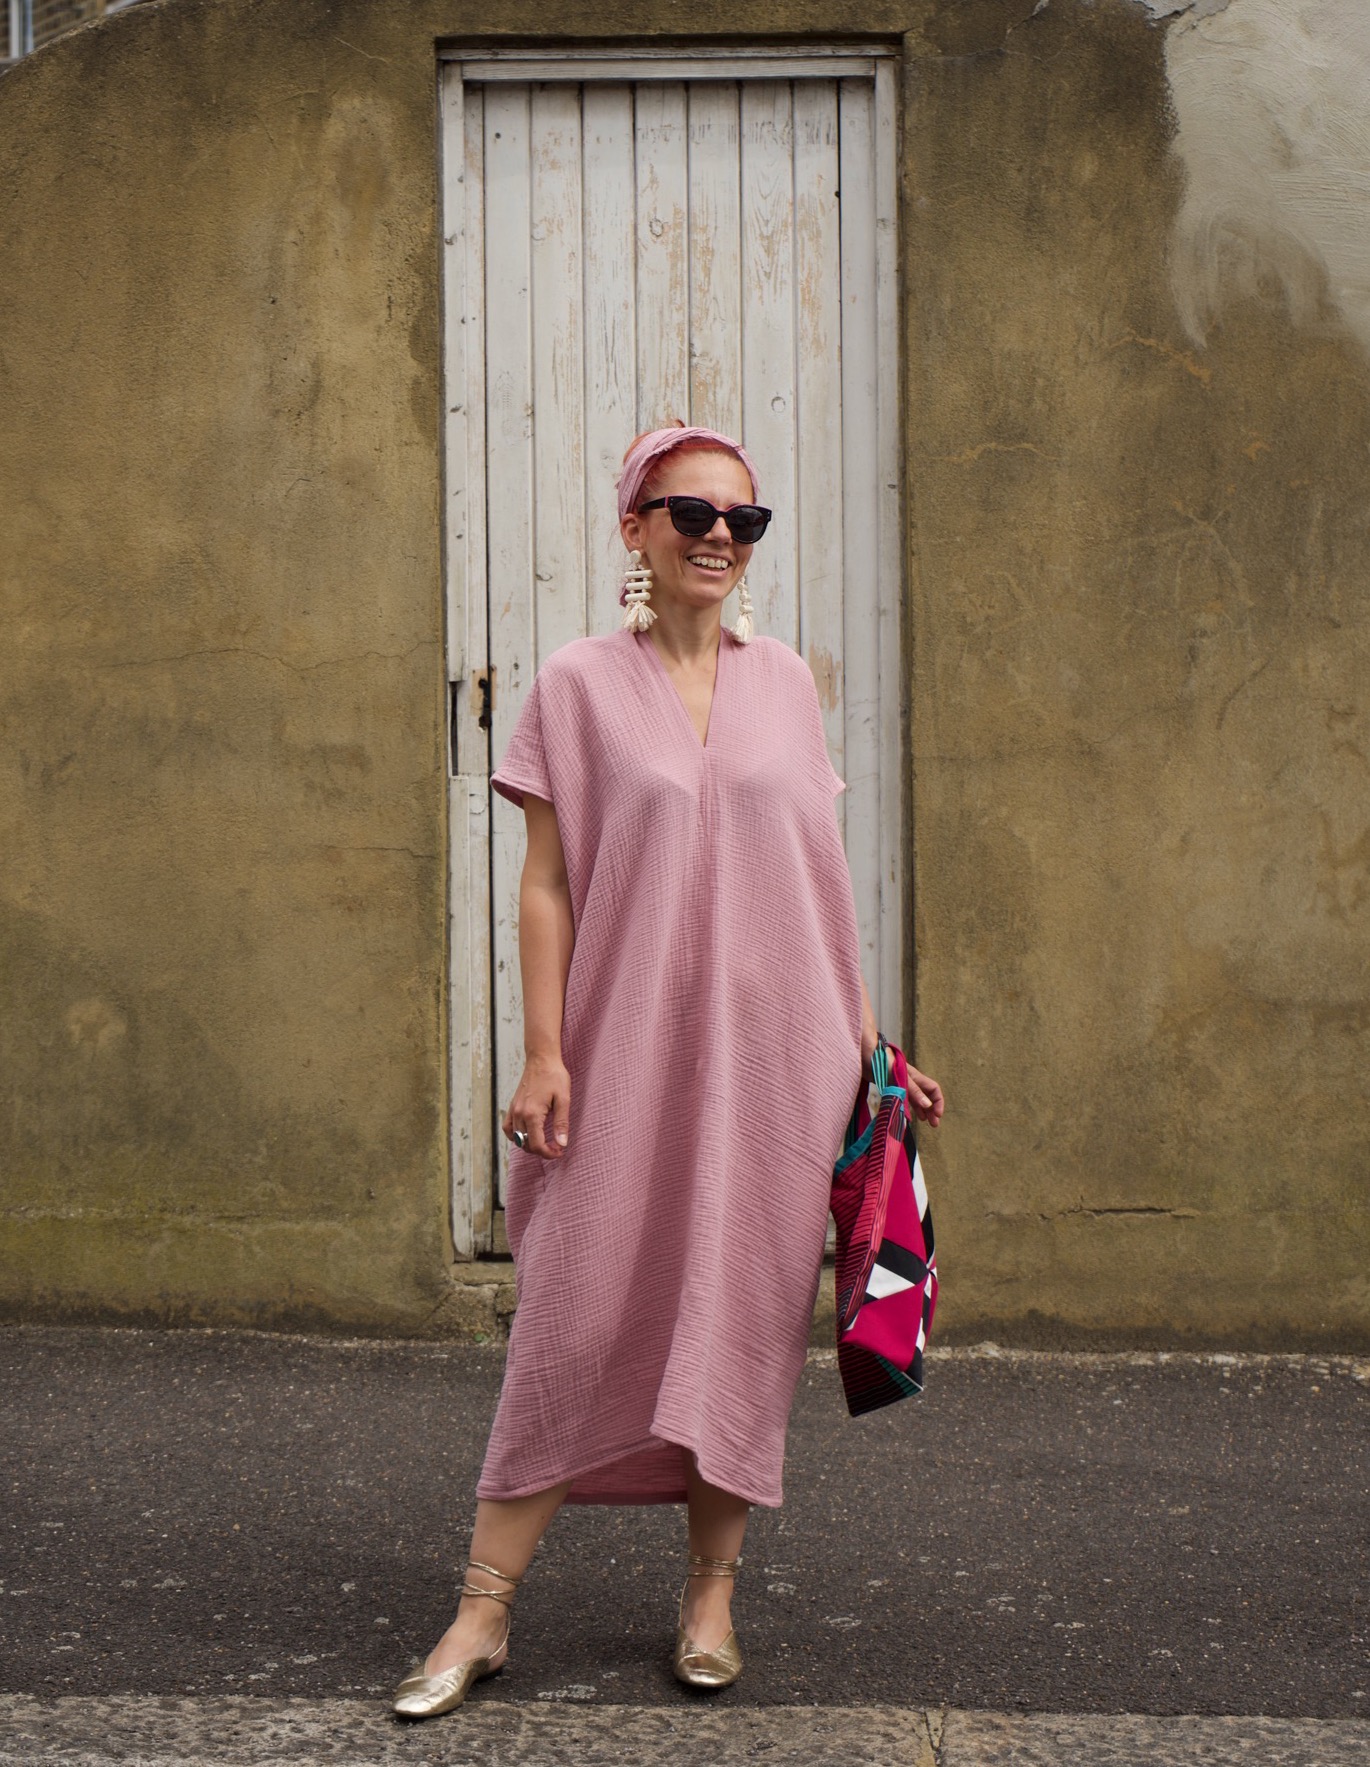
The pattern consists of three pieces and the downloadable file itself doesn’t even need to be printed. There are two versions, one made to measure and one that is one size.  I went for the latter because I was too lazy to do the actual maths.

IMG_0346

The front of the dress is two separate pieces that are sewn together leaving only an opening for the head. I carried on sewing a little further than what the pattern asked as in the top version the opening was a bit too low. You finish by topstitching around the seams.


The back is made out of one continuous piece that is then sewn on the front piece and finished with topstitching that creates a beautiful detail as seen above. I really like the fluidity of the dress and how it falls on the body creating an elegant yet extremely comfortable garment.

IMG_0375

I bought 1.5 metres of cotton double gauze from Sew Me Sunshine . It is cut across the grain with the selvedge at the top and bottom of each piece. In full length it covered my feet, so I estimate I took off about 20cm to get to the length in the photo. (sorry I didn’t actually measure it)

IMG_0370 (1)

As the pattern says, this is a very versatile dress that can be formal or casual, a beach cover-up, a maternity dress, or a night-gown. It was sewn in a breeze even by myself who manages to sew the simplest things in very slow motion. I finished all raw edges with a serger. There are two more in the cards as presents so I hope I have enough leftover double gauze for a colour blocked top at least. I felt extremely stylish the whole day I wore the above outfit. I wish I could dress up like that every day.

(my hair has ben so horrible during corona times that I think it’s only acceptable accessorised withe a scarf, haha)

photography: @juniperific

Posted in sewing | Tagged , , , , , , | 1 Comment

Pietra Pants Closet Case Patterns

53DC010F-C508-400D-95A9-FCB36B83EBF7

When I took the photos for my newly made Pietra Pants, I had finally dyed my hair after eight weeks. It seemed my dye had been out of stock everywhere I looked.  Putting on some proper clothes and some make up, definitely made me feel more human, than what I had in the past few weeks of the lockdown. Going around for hours to find a nice spot for the photography was off limits, but because of all the above occurrences I wanted to still have a bit of a creative setting, which was achieved by bringing some of the inside outside. The gloomy weather of the day created some added drama.

IMG_7726

I tried to make the Pietra Pants during the great module sew along challenge, see previous post, more with a refashioning approach, than starting from scratch and it ended up in a disaster. Due to the amount of fabric I had in my hands, I could only make version B, the slim and tampered leg one. This has never been a flattering shape for my body, due to the ration between my waist and my hips size. I have a couple of RTW ones which are a good fit but in general I avoid them. According to the size chart in the instructions I am a size 4 waist and size 6 hips. However, I know that Closet Case Patterns have a lot of ease, I made one Cielo dress and it was huge, so now I always go one size smaller than the one on the size chart. These trousers were no exception. I started this pair with a size 2 waist grading to size 4 for the hips. Unfortunately the trousers were still quite baggy everywhere so I went to size 0 for the waist and 2 for the hips, which was a big mistake, as I ended up with really tight hips and still not a tight waist. I did a few other mistakes, like interfacing the whole pocket rather than the top part only, and not inserting the front facing correctly. I still feel though that the fabric combo is great, so I am determined to at least make winter Pietra shorts with it.

0FA2DCB9-2081-428C-9722-90476FD98913

The failed Pietra Pants though, was a great exercise that helped me create the much nicer pair above. Admittedly this is view A the wide leg version, which is my favourite and the reason I bought this pattern. Here I went for the 0 waist again and the size 2 hips and I think it’s worked fine. You can see how small my waist is compared to my hips. The fabric is a cotton linen blend from Minerva Crafts in the most gorgeous rust colour.

39B0F135-DEBC-43AE-BAB4-770D87392651

I followed the excellent tutorial at Closet Case Patterns site on how to insert an invisible zipper in order to accommodate for the small waist-big hips ratio. TheThe photography shows step by step how to insert the zipper and the sew the elastic band at at the back. Great also for when you are sewing the trousers with sturdier fabrics. I didn’t have a zipper in the same colour as the trousers so I used a white one, but I think I have done a good job with the invisible sewing that it’s hardly noticeable. I love the shape of the pockets which are perfect to put my phone and keys in when I pop to the corner shop. I also like how the split leg creates this nice stripe at the front.

BD32EDA9-8F91-49E5-A8FA-E40CB31C057F

I think the back looks ok too, not sure I have gathered the elastic as evenly as I was meant to, but it’s good enough for me at this stage. I feel due to the fact that the fabric is quite soft and as it happens with this stock of linen and linen blends, they seem to become a bit looser as you wear them, or maybe I wear them too much, I could probably take it in a little bit more, definitely between the waist and hips, but overall I am quite happy with them. I would like to try them in a heavier stock fabric. I feel there is a few more of them in my sewing days, probably in the same way I keep sewing Cielo Tops.

161734CB-3CE7-4C70-97DD-9C1EE76A64B4

The top is another Cielo top, which I sewed for our Christmas day dress up. It’s a beautiful Japanese inspired cotton that I bought on eBay. The mask is made out of the leftover fabric and it is the free pattern (with optional donation, which I took) from Trend Patterns

Photography @juniperific


Posted in sewing | Tagged , , , , , | 1 Comment

The Great Module SewAlong Challenge

I started reading The Curated Closet some time ago and although I didn’t finish it, it got me thinking as to what clothes I like wearing most but also what kind of clothes my wardrobe is missing. I love the idea of a capsule wardrobe but at the same time I like variety and a combo of serious and playful outfits. Sometimes, yes, my clothes and the way I choose to wear them are a little bit out there, which is, I would say is an accurate description of myself as well, but this is how I roll, haha!

My reasoning behind participating in The Great Module SewAlong isn’t exactly to create a capsule collection, it is more a way to force myself to create clothes that I need, they fit with what I already have and they come from the resources already existing in my stash, although I admit, I managed to sneak in another piece of fabric from the Cloth House. I blame my workplace that’s so close to it. I’m also not creating for a particular season, it’s a mix of garments and fabrics so some will work with the winter clothes, others with the spring ones.

In the process of mixing and matching my existing garments, I have discovered that I love my clothes more, now the majority of them is hanging in the wardrobe rather than them being inside drawers. I feel I can actually see them.

So here are the details for the challenge. Sew  3 tops, 2 bottoms and a topper till March 24th. The time will be the real challenge but I think it’s achievable with what I have in mind.

For the three toppers I have chosen the below:

Turtleneck Monroe, a free pattern by Tessuti, in a combo of two brown jerseys, neither of which is enough for a whole top. I have been holding on to the sequined one for at least seven years. The other one is a remnant from some leggings I made for my son, when he was very little. This top is actually finished and has been worn since then.

DSC_2880

Next is the new pattern by Secondo Piano, the Dolce top, also in the turtleneck version but this time in a lighter brighter yellow.  I have just put the PDF together and will soon be cutting the fabric.

DSC_2881

The last top is a bit tricky as it’s based on an inspiration image that appeared on my IG feed. I just fell in love with all the stripes.

I’m going to use three different stripey fabrics and perhaps one more for some fun details. As for the pattern, I have an old Salme Patterns shirt pattern that I made in two muslins, none of which was wearable, but always liked the style and the mandarin collar. As for the sleeves, I think I will use those from a vintage dress pattern and maybe expand them a bit more. I haven’t made any final decisions on that front.

DSC_2882

One of the two bottoms is the Axis Skirt by Papercut patterns, which I bought recently wanting to make the dress initially but I like the pencil skirt version as it is a bit different to the classic one. I have already made a version of it, which is, how do I put it, a bit too small. I forgot to grade between sizes and as my hips are two sizes bigger than my waist, you can appreciate I suppose, why it didn’t work. The fabric is another stripe version, although it creates a much more playful visual effect than on the sample below.

DSC_2883

For my second bottom, I decided to finally fix this pair of trousers I made when I was about 4 months pregnant and is a but too big now. I’m not loving the style a lot but this is also the only fabric I have, so I can’t create a different design. I do like the fabric though.

DSC_2879

Finally, I’m anticipating that I will have run out of time by the time we get to the topper section, so instead of making one from scratch, I will try and fix this Belatrix Blazer (Papercut fan), which I love, but don’t wear due to the fact that I’m not happy with the sewing on it and also because the lining has ripped. Of course, unpicking and sewing again something is almost as time consuming as making one from scratch but at least I will not have to cut the pieces again, or at least not all of them.

DSC_2878

I’m hoping to be able to make all of these items and present you not only with the finished garments but also with how I have incorporated them in my existing wardrobe.

Posted in sewing | Tagged , , , , , | 2 Comments

Cielo Top, Alter it August and Bruna blouse

I bought the Rome collection by Closet Case Patterns, as soon as it was released, because I felt all three pieces were really versatile and also a lovely capsule collection.

Some time ago, I sewed the Osaka dress from La Maison Victor magazine, in this lovely  cotton poplin by Minerva. Unfortunately the dress ended up a complete disaster both in construction and in fit. I hated it so much that I didn’t even take a single picture of it. to be fair, big part of the problem was the fabric, which was initially purchased for a different, more appropriate project. I did love it though, and as soon as I saw the Cielo top, I hoped that the dress would transform into it. And Alteritagust, gave me the motivation that I needed to go for it.

DSC_2813

I was dying to try the lantern sleeve option so this was the one I sewed first. Although I liked it on the hanger, but when I put it on, I was terrified by the look of the sleeves. They seemed huge and I felt at best like a rugby player.

DSC_2810

However, after pairing it with different items in my wardrobe, it grew on me and two weeks later, it’s become one of my favourite items.

DSC_2822

It was a bit of a puzzle construction at points, but there was enough fabric for most of it. i have finished the hem and the sleeves with a bias tape that’s been in my stash for much longer than I can remember.

Following that and being really inspired by alteritaugust, I used an old curtain to create the version with the short sleeves. This was a dream to sew, since I had already done it once. With the help of some fabric paint, I added some splashes of colour in an attempt to recreate an outfit 11 of Stranger things tries on briefly, while at the mall.

Screen Shot 2019-08-13 at 3.07.46 PM

I had so much fun making this and I had to stop myself from pairing it with a skirt from the remaining curtain, to copy the complete outfit, haha!

DSC_2827

Although a simple top, it has some lovely details like the cuffs of the short sleeves.

DSC_2839

The neckline facing, that is probably one of the few facings I am pleased with and the back shoulder pieces, which you may not be able to see in any of my two versions due to the pattern of the fabric. I have hemmed this version properly. For both versions I went down a size from that corresponding to my actual measurements. I like a boxy top but I don’t like it when there is too much of a box around me. I probably need to go down one more size at shoulder/neckline as it is a bit too loose on that front but not especially noticeable.

DSC_2838

DSC_2832

Since I’ve mentioned Maison Victor here and although this started life as a solid fabric with the intention of making the Bruna Blouse. I asked in my instagram stories what you thought I should sew with it and two of my friends suggested different types of dresses. To be honest, I wasn’t really sold on the idea. This is a very busy fabric and I didn’t think it would look good on me as a dress. Nevertheless, I went ahead with one of the suggestions, secretly to also prove me wrong. I made two versions of a similar dress which I hated, so went back to plan A and sewed the Bruna Blouse.

DSC_2800

The collar needs a bit of work I grant you, but at this point I have already sewn it three times, so I will have to fix it at a later stage.

DSC_2797

Again you will see that due to its previous incarnations there weren’t long enough pieces to accommodate the pattern, so I resorted again to my favourite method of puzzle construction, haha! I think it’s far from perfect but it is acceptable for me and I really like the look of the shirt, which I have already worn.

I didn’t sew the side seams all the way to the bottom but decided to leave them open on the sides as a design feature. I have finished the hem and the sleeves with the same bias tape as the cielo top.

DSC_2801

I didn’t submit this for alteritaugust, but again, it was the challenge that really pushed me to finish this one too. Mending and altering garments was very satisfactory, even more so than sewing something from scratch and I’d love to carry on doing this kind of sewing for longer than the 30 days of last month, because i may not have a big fabric stash, but I have a huge pile of clothes that either need mending or could be refashioned into something more wearable. Watch this spot.

DSC_2809


Posted in sewing | Tagged , , , , , , , , | 2 Comments

The Very Greek Jumpsuit, AK Patterns Rachel Jumpsuit

If there is a garment that I never wish for it to go out of fashion, this is the jumpsuit. I love it in all forms and shapes, dressed up or down, formal or casual. I don’t even see the problem with the toilet, I’m even willing to tell you there isn’t one, haha! You can imagine my immense happiness when I realised that the #sewtogetherforsummer garment of this year was going to be the jumpsuit. When it was confirmed, I threw the greatest imaginary party in the history of sewing parties.

DSC_2270

My jumpsuit sewing queue is endless and I don’t even own half of the patterns, I’d love to sew. However for this particular challenge I decided to take advantage of the discount that was offered once the challenge was announced and chose the Rachel Jumpsuit by AK Patterns. I’ve admired Athina’s patterns for a while but never got round to buying any of them, so saw this as the perfect opportunity to give it a go.

DSC_2272

During Me Made May, I kind of pledged that I would participate by casually wearing my me mades but also refashioning/mending something. The Rachel jumpsuit is also part of this pledge. I had originally cut and sewn the bottom as a different jumpsuit from Burda, hacked with a corset stye top, which I ended up not liking, mostly because it was too big and needed too many alterations, that I didn’t feel like making. I recut it but as the legs for the Rachel are a bit wider, I had to add an extra piece on the side of each leg, front and back, which created a really nice effect of some sort of stripe on the side. I’m not sure how visible it is in the photo. The fabric is a type of cotton sateen, I’m assuming, with a nice texture that’s not very visible in the photos.

DSC_2274

I cut a straight size 10 and made no alterations. I think the fit is spot on and managed to do not a too bad job with the invisible zipper, which naturally had to install and uninstall a couple of times.

I love the top of the pattern front and back, I find it unusual and unique at the same time and I already have some ideas for adding things to it. The trousers also work great as trousers, so watch this space for a pair too. I can’t recommend the pattern enough. Not only it’s extremely well drafted, the instructions are very detailed and clear too.

DSC_2253

I call this the very Greek jumpsuit, pattern designed by a Greek, sewn by another Greek, with a fabric that was bought in Greece. Perfect for relaxing on the grass too. Thank you Monika, Sarah and Suzy for organising!


Posted in sewing | Tagged , , , , , | 1 Comment

Yellow Tartan Dress

DSC_2128I’m not sure what I am trying to say with these pictures. I love the colourful editorial photography that takes place in a domestic environment and since this one took place in the middle of the night, like most of my extra-curricular activities, it could have only taken place in such environment. I was determined to have yellow bright or at least colourful things surrounding me that I even unearthed my son’s yellow plastic balls, which haven’t been used in a while.


IMG_8255

The inspiration for the dress came from this Delpozo dress I stumbled across on Pinterest, the place of my eternal inspiration for everything. I really wanted to find something in a pink hue but after having searched in various fabric shops, I ended up buying two metres of this wonderful yellow Cornish tartan from Truro fabrics. Their fabrics are of the highest quality and I love buying from them when the budget allows.

DSC_2147
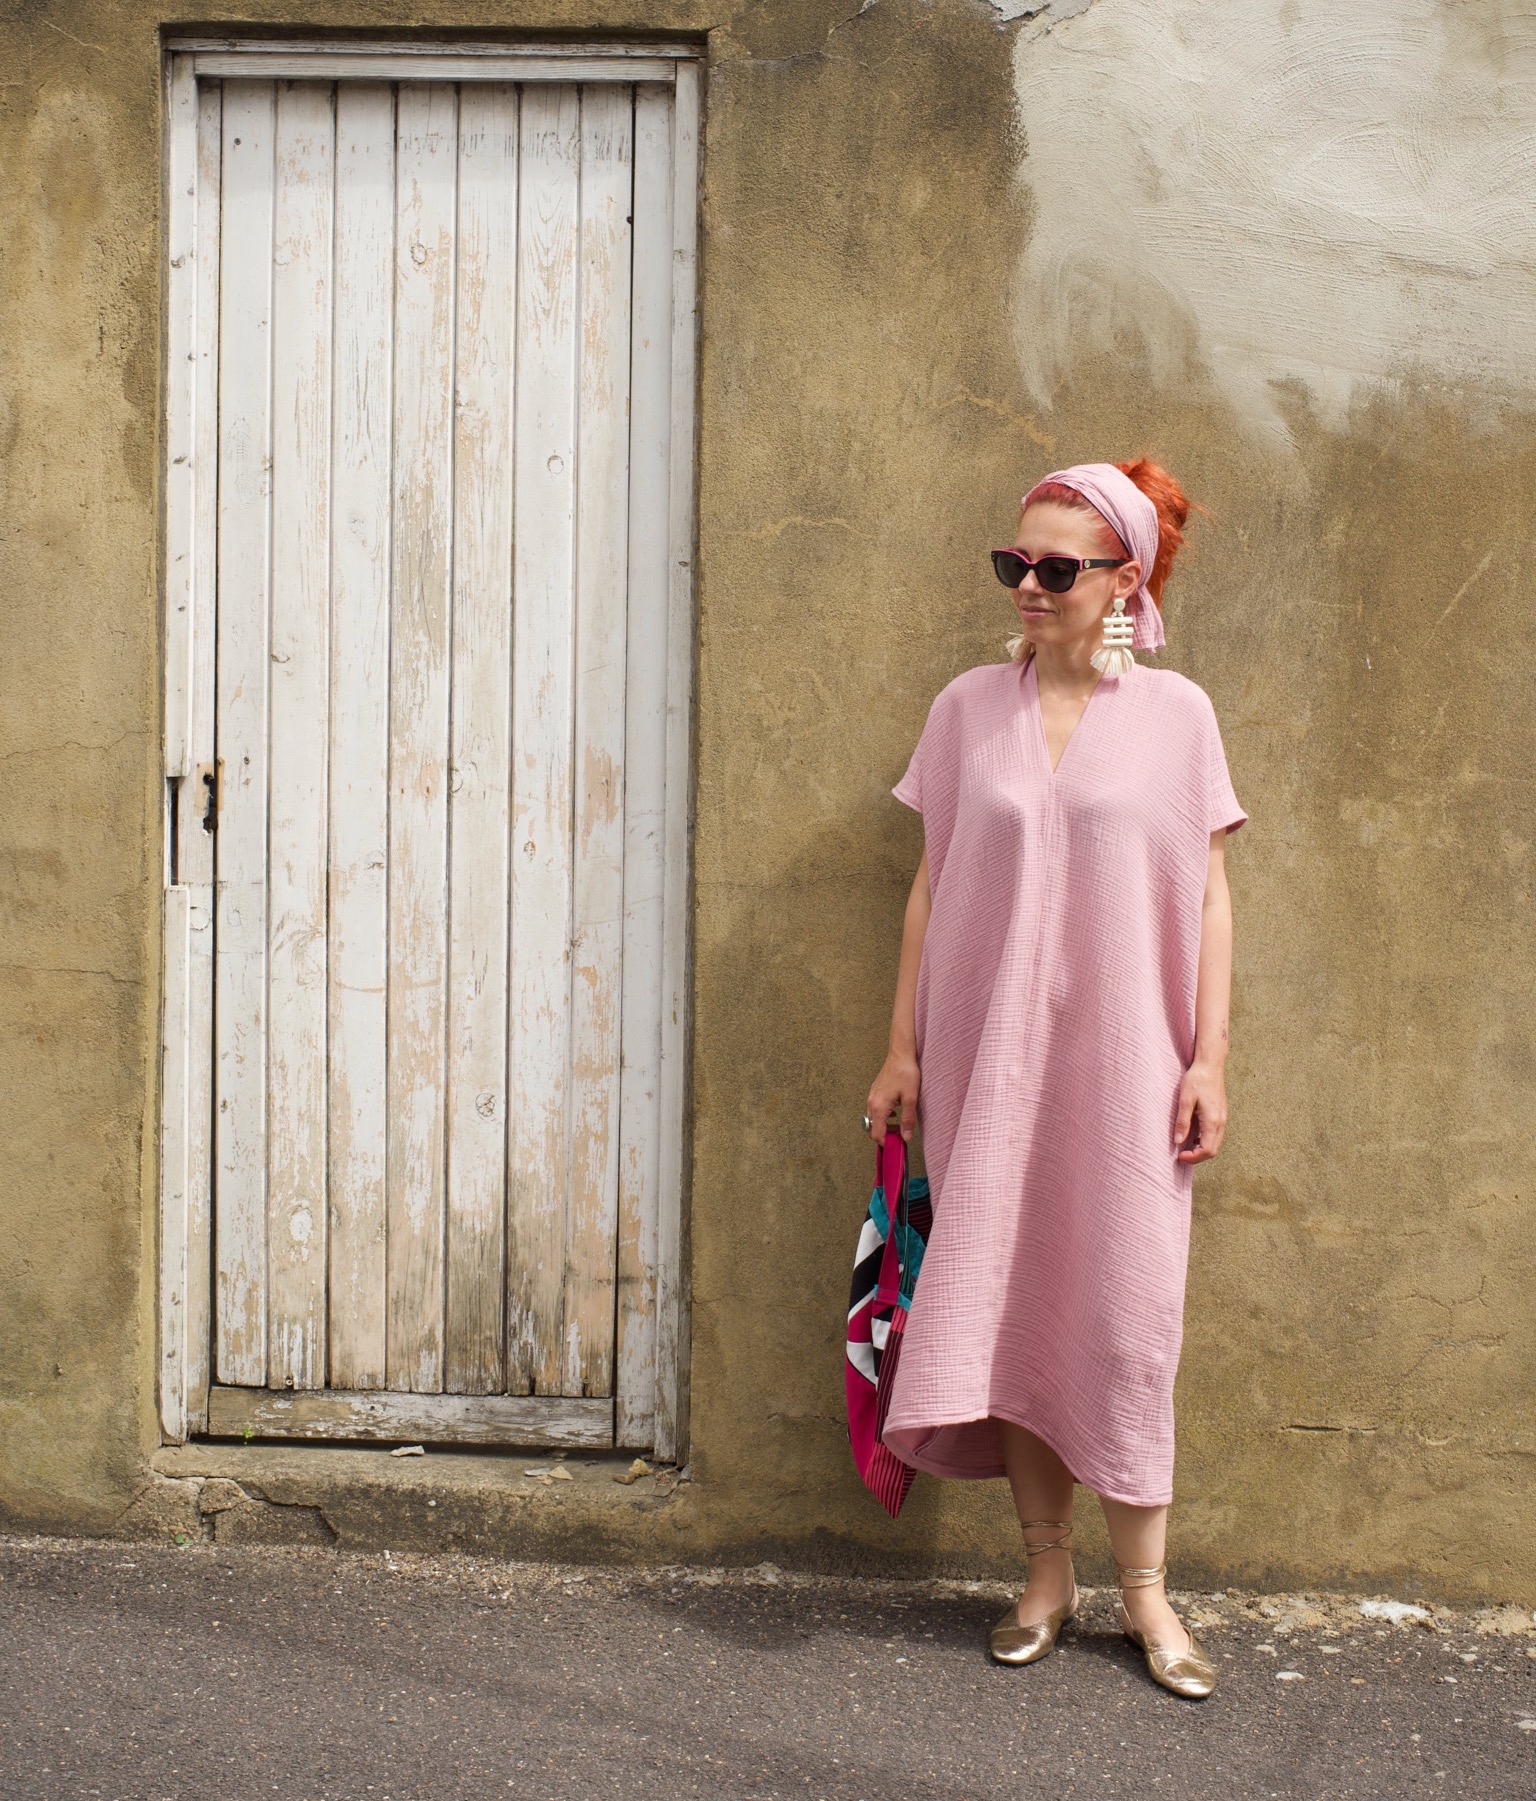
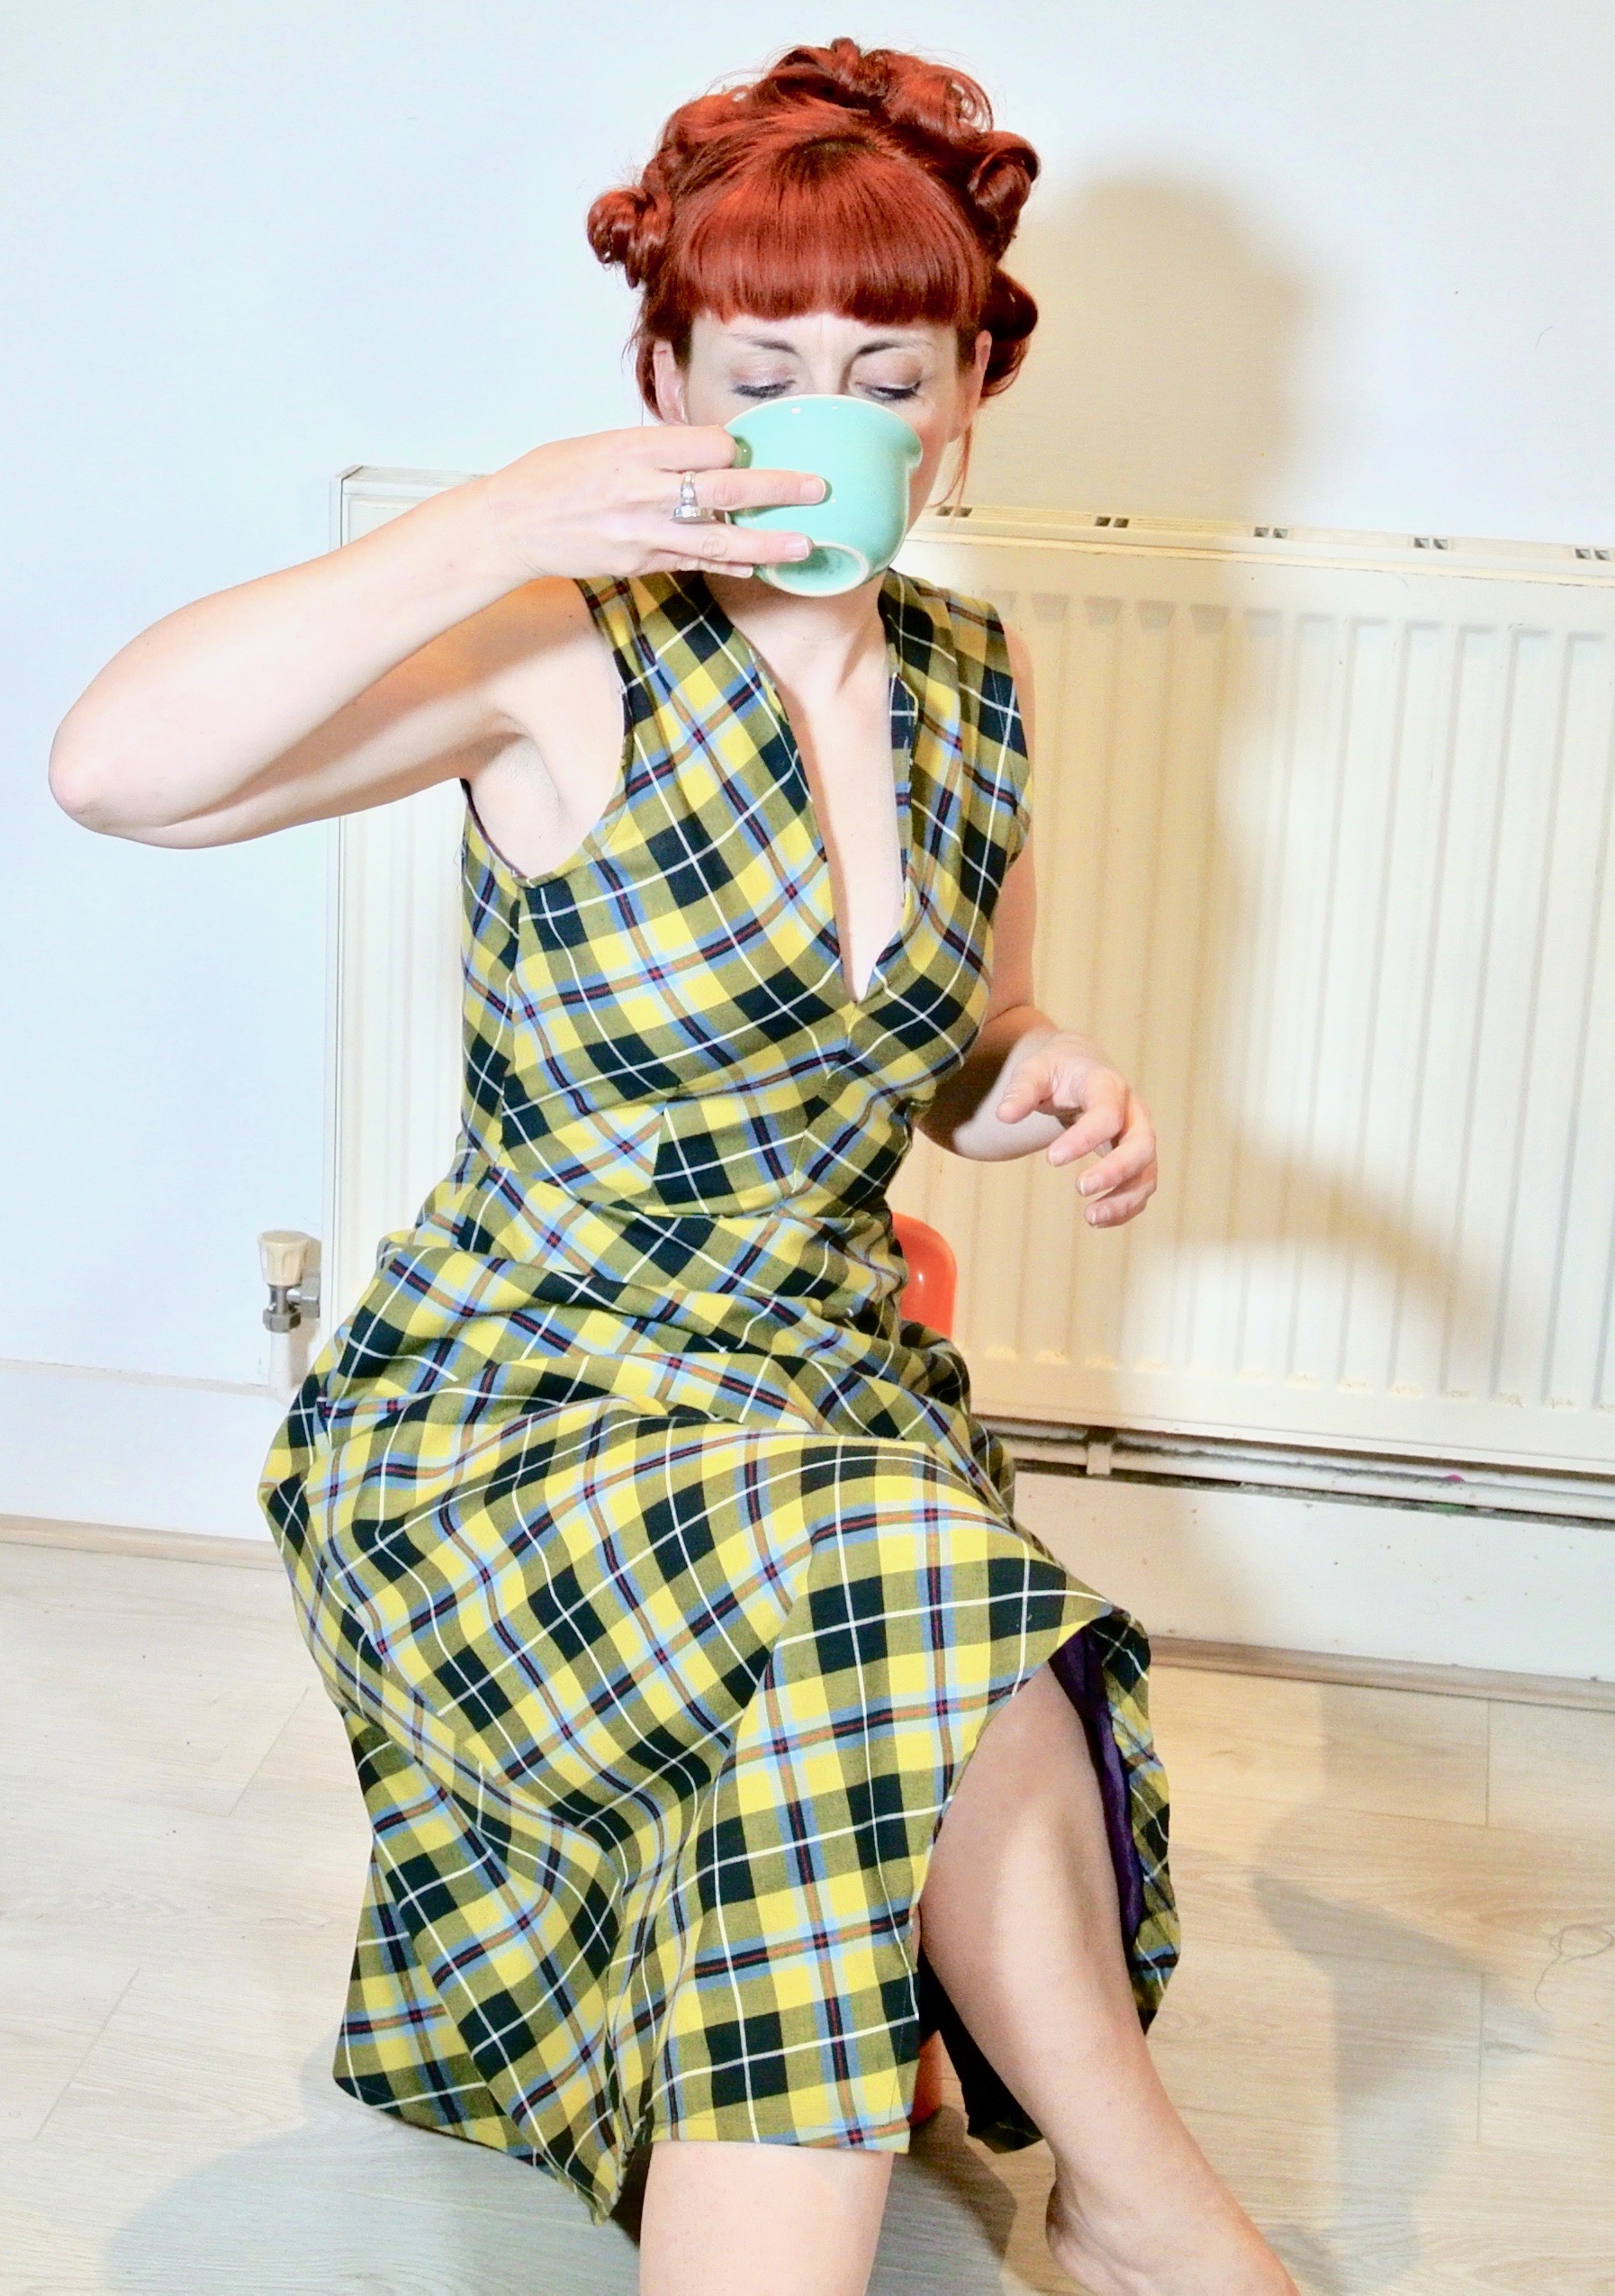
The top of the dress is this burda peplum top,  minus the peplum and the sleeves. The top is also the only part of the dress, I pattern matched, as per my usual bad habit, I didn’t think of buying enough fabric to accommodate that.

DSC_2158

As you can see any sense of pattern matching has disappeared in the back, which looks a bit messy. To be fair though, I had matched everything but due to some modification it seems that the pattern wouldn’t align anymore. I have to admit, I find the process a bit intimidating and try to avoid it when possible. What can I say, I am a bit lazy in that department and also don’t care too much. It does look great when it happens though.

The bottom is a self-drafted A line skirt, cut on the bias, ending in a handkerchief style hem on one side.

DSC_2157

The skirt is underlined as the fabric is very drapey and I wanted it to have a bit more structure. I have added facings for the neckline but have finished the arms with bias binding. There is also an invisible zipper on the side.

DSC_2154

Despite the simplicity of it, it took ages to finish as it was a bit troubling getting the right fit at the top. Overall, I’m really pleased with it and I think it’s a dress that could be dressed up and down, simply by changing my shoes and hair style haha!


Posted in sewing | Tagged , , , , | Leave a comment

Designin’ December 2018

IMG_0053

Although well in to 2019, only now did I manage to take some pictures of my finished entry for Linda’s of Nice Dress! Thanks, I made it! Designing’ December. I’ve been trying for a couple of years now to take part but always run out of time. This year was no exception and I barely made it. Part of the problem for me isn’t just the lack of time and the fact that I want to sew a trillion more things that I can, but also the too many ideas and inspirational images I pin on Pinterest, that make any decision, simply impossible.

IMG_6883

My inspiration  was this photo that I originally saw in Stylist magazine and immediately cut out and stuck in my notebook, so that I don’t lose. Later on, I found it on Pinterest by chance.

Delightfully-Peculiar-Blue-08198

To construct my version, I used the Papercut Patterns Mito Cami. I cut the bottom front into two pieces and sewed an extra black fabric around the edge of each of the front pieces, top and bottom.

Delightfully-Peculiar-Blue-08226

The first top buttons are functional and keep the front together, whereas the all the rest are decorative, purely for recreating the look of the original piece. The inside is fully lined, front and back.

Delightfully-Peculiar-Blue-08218

The fabric seems to be wool of coating weight, which I found in a plastic bag marked as rubbish near where I live. I suspect that behind the closed doors, outside which this bag was lying, there is a small coats sewing operation and these pieces were discarded as scraps. It was very fortunate that they came in good shapes and sizes to be used in this project. Of course, there wasn’t enough fabric for any pattern matching but it’s not the end of the world, especially since this process isn’t my favourite. I also opted for a high-low hem.

Delightfully-Peculiar-Blue-08211

I had initially cut the back the wrong way round and only realised after I had finished it and while wearing it, I noticed that the nice shape of the low cut back was missing. Luckily there was still enough fabric to recut it. I also omitted the adjustable sliders as the straps fabric is quite thick and it wouldn’t fit the sliders I already had. Delightfully-Peculiar-Blue-08254

All things considering, I’m very pleased with how it turned out and I think I may like it a tad bit more than the original piece. Linda was very generous with the presents and gave each participant one. I chose the Lliria Dress from Pauline Alice Patterns, which I’m hoping to be able to sew this year. Again big thanks to Linda for organising.


Posted in sewing | Tagged , , , , , , | 1 Comment